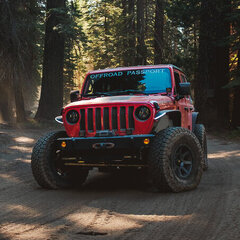
4x4tographer 3,642 Posted May 1 A fav from the recent Rug Road trip! 3 Share this post Link to post Share on other sites
4x4tographer 3,642 Posted May 24 A few favs from our recent Lake-to-Rim Overland Route. A rare personal appearance, thanks to @johnpa 4 Share this post Link to post Share on other sites
4x4tographer 3,642 Posted August 20 Work, life, and family have had me pretty busy lately - so I've been neglecting signing on to the forum! Over the last few months I've been getting more focused on the Jeep and prepping ahead of the upcoming Dusy Ershim trail trip this September 2026. I've also been chasing down a nagging "shimmy" around 50-55mph in the front end. Since the last update: New Dynatrac HD balljoints for the front end Replacement Clayton offroad bushings in the front UCAs and trackbar Replacement of the tie rod ends for both the drag link and the tie rod itself Replacement of a broken Fox ATS steering dampener bracket New/replacement Metalcloak bushings in the front axle UCA bushing locations A visit to our friends over at @OnPointOffroad for new front brakes and service, differential service, transfer case service, and an overall inspection for "Dusy-Worthiness" New front and rear Adams driveshafts (1310 and 1350, respectively) Re-wiring of my entire rear aux electrical system while trying to figure out a voltage collapse issue when my DC-DC charger is running A "chop job" on my storage/sleeping platform in the rear Design/ordering/fab/install of a new bracket to keep my Bluetti power station safe during trips Install of a like-new American Adventure Labs overhead front molle panel from our good friends @J2DXPLR New hood-mounted Hi-LIft jack mount New Yaesu FTM-150R ham radio with the MARS communication mod (GMRS) Starlink satellite dish install Here's the new Dynatrac BJs - @theksmith was kind enough to stop by and help with the install. Overall, the job was easier than I originally anticipated. The lower BJs (formerly Teraflex) were shot and pretty sloppy. They didn't last as long as I'd originally hoped they would. The removal of the steering knuckles was the biggest pain during the process - requiring a sledge and a 2x4 to knock them out. A combo of WD40, PB Blaster, and a little heat also helped coax them out. My new ICON balljoint press has been invaluable these past few months during the BJ install and when tackling the various suspension bushings around the Jeep. Each BJ came right out after about 20 seconds with this beast of a tool. The reinstall was just as fast. Did the job over 2 evenings - and now I know how to do it! (This was my first time). Next up was an install of an AAL overhead molle panel. I have their seat and door panels in the Rubicon dash red, so I jumped on this when I saw Jacq & Jermey offering it up. THANKS GUYS!!! There was some squeaking when flexing the Jeep on the rocks that was livable. but I think I might have solved it by installing a few rubber washers where the molle panel makes contact with the Jeep's sport bar. Time will tell :) Additionally, I've upgraded my radio comms to a new unit from Yaesu. The base station tucks nicely into the overhead molle niche. A little fiddling with my 67Designs (RIP) platform on the dash, and I've got the head unit and mic nicely within reach. Next up - I tackled my front suspension bushings - but have only gotten as far as the UCAs and trackbar at this point. I'll need more time to replace the rest of the bushings throughout the suspension. Again, the ICON balljoint press made quick work of this. These bushings were replaced with new ones from Clayton. I picked up an optional bushing press tool from Clayton to keep the job simple. New trackbar bushing Here's the ICON BJ press. While I had the UCAs removed, I took a look at the axle-side bushings and saw they were chewed up pretty badly. These are the OEM factory bushings with 90,000 miles on them. About 1/4 of their life they've had 35s and 37s and a longer-travel suspension stressing them out. Again - the ICON BJ press came back out for another jam session in the Arizona heat. Unfortunately I didn't have the "right" adapter in the kit, but the 32mm socket I keep around for removing front axle shafts was juuuuuuuust right. New Metalcloak "duroflex" bushings installed. More to come in PT 2! 4 Share this post Link to post Share on other sites
Curly 1,317 Posted August 20 Nice work! I have the same Yaesu radio, but a few years older. I just realized its 16 years old now and I've never had trouble with it. The GMRS mod is nice. 1 1 Share this post Link to post Share on other sites
4x4tographer 3,642 Posted August 20 Welcome back to Part 2 of my catch-up post 😁. This chapter begins with my shaft. It's seen some miles and had some wear and tear. However, we're also going to look at my rear storage deck and some electrical stuff. The boot over the slip portion of the shaft was a little torn and bulging, but wasn't throwing any grease at this point. This is the OEM driveshaft, so again it has 90,000 miles on it and a number of wheeling trips. In all, it wasn't giving me any issues at all. My decision to upgrade was based on: A desire for a more "bomb-proof" driveline Better droop in the front suspension. In the future I'd like to go to longer shocks for more down-travel. I have about 1-1.5" of unused up-travel with my current set up. However, IMHO, going to longer sticks will set off a chain of upgrades, including a front driveshaft with better angles, longer front brakelines (which I have in my garage, waiting to install). So - since I've been looking to upgrade both my front and rear to a stronger but "smaller profile". My choice ended up being for a pair of Adam's driveshafts - 1310 in the front, 1350 in the rear. Here's a series of shots from the install. My first time seeing green locktite. Rear yoke on the transfer case Flange on the rear differential. Rear diff flange removed Back side of the transfer case The white marker was my attempt to get the pinion nut precisely back to where it was from the factory. However, I couldn't get the pre-load measurement to work out. Instead, torqued it to 140 ft/lbs per Tom Woods' directions and common advice found out there for the install. The rear, all buttoned up. Here's a shot of my red locktite'd pinion nut through the new yoke. The front was a lot faster of a job for some reason. The other project I've tackled recently was a "slimming down" of my rear storage deck. Since I have an AAL rear shelf, and the top of my deck was pretty tall, I had pretty limited leg room when sleeping in the rear of the Jeep. I measured it around about 12" of vertical space which made me feel a little claustrophobic sometimes, depending how much I inflated by air mattress and the bedding I'm using (like my trust 30" thick Coleman sleeping bag). 😄 I basically ended up removing the top with my oscillating multitool and a circular saw. Then took off 3" from the overall height of the walls, and then re-glued and screwed the top back on. Consequently I needed to trim the drawer as well to accommodate the new, shorter profile. Here's the box reinstalled, and a little dirty. My next project was to fix my wiring situation in the rear of the Jeep. I was having some issues with my Bluetti Charger One DC-DC charger running into a voltage issue. The relay would trigger, charge my Bluetti power station, and then the voltage would collapse and the unit would re-cycle. It'd charge the battery, but it took forever as the relay would cycle every 60 seconds or so. Theories ranges from a bad ground to damaged wires to some other constraint along the wiring from the main battery/alternator. It didn't take long to find the culprit. Talk about a minor heart attack finding that. The 100A fuse took a dump, but never disconnected. It became what looks like a superheated mass of melted glass and plastic. The fuse sat at a connection between an 4AWG wire from the main better, terminated into an 8AWG wire that led to the rear. At @theksmith's advise, I upgraded the wiring to the rear to a large 4AWG wire, and ditched the crappy Chinesium fuses for a MIDI fuse holder from Blue Sea Systems. I also re-installed my ground - upgrading it to 4AWG as well, with a shorter cable and a more solid ground mount in the rear tub. Additionally, I make a small tweak to my connector for the Bluetti Elite 100 v2 with a right-angle connector to help protect the connector from things flying around the rear deck. I also designed and "built" this cradle out of aluminum via Send-Cut-Send to hold the power station so I could bolt it down to the rear shelf and run a strap over it to keep it in place. In the below shot you can also see my half-baked Starlink Mini mount, which is a Frankenstein of my hi-lift c-pillar mount and some RAM mount stuff. I relocated my double water jug set-up and moved my 6gal of water capacity to the passenger side, away from my electronics. Whewwww....... that's a lot of work these last few months, especially when it's 110 out! My garage swamp cooler went through about 2,000 gallons of water. Last upgrade - a new mattress inflator! It's from Flextail and is a 5 kpa unit that is smaller than my key fob and includes a built-in lantern. It's 3x faster than my current inflator that is 5x the size! 3 Share this post Link to post Share on other sites
ob1jeeper 849 Posted August 20 You've been a pretty busy beaver Ryan... ;) Looking good... 1 Share this post Link to post Share on other sites
Mick Bowers 457 Posted Wednesday at 12:13 PM Ryan Really need of a mount for my Jackery 300 that sits behind the Fridge. Use it to kick in when I shut off the engine. Currently I use a bunch of straps. This appears to be a superior solution. How can I get one? thx Mick Share this post Link to post Share on other sites
4WLNRN 774 Posted Wednesday at 01:51 PM 1 hour ago, Mick Bowers said: Ryan Really need of a mount for my Jackery 300 that sits behind the Fridge. Use it to kick in when I shut off the engine. Currently I use a bunch of straps. This appears to be a superior solution. How can I get one? thx Mick American Adventure Labs out of Hurricane, UT. Great people to deal with, And they make stuff for Land Cruisers as well if I remember correctly. 1 Share this post Link to post Share on other sites
Mick Bowers 457 Posted Wednesday at 05:22 PM Okay. I’m on it Thanks Share this post Link to post Share on other sites
4x4tographer 3,642 Posted Wednesday at 06:14 PM 4 hours ago, 4WLNRN said: American Adventure Labs out of Hurricane, UT. Great people to deal with, And they make stuff for Land Cruisers as well if I remember correctly. 5 hours ago, Mick Bowers said: Ryan Really need of a mount for my Jackery 300 that sits behind the Fridge. Use it to kick in when I shut off the engine. Currently I use a bunch of straps. This appears to be a superior solution. How can I get one? thx Mick Hi Mick, the shelf and water carriers are American Adventure Labs. The carrier for my portable battery is custom made. I designed it in Affinity Designer and then sent the file to Send-Cut-Send, who CNC'd the aluminum and performed the bends. https://sendcutsend.com I used them in the past to create the aluminum tray that my fridge sits in. 2 Share this post Link to post Share on other sites